Blogs
7 Smart Tips to Prevent and Handle Bathroom Water Damage
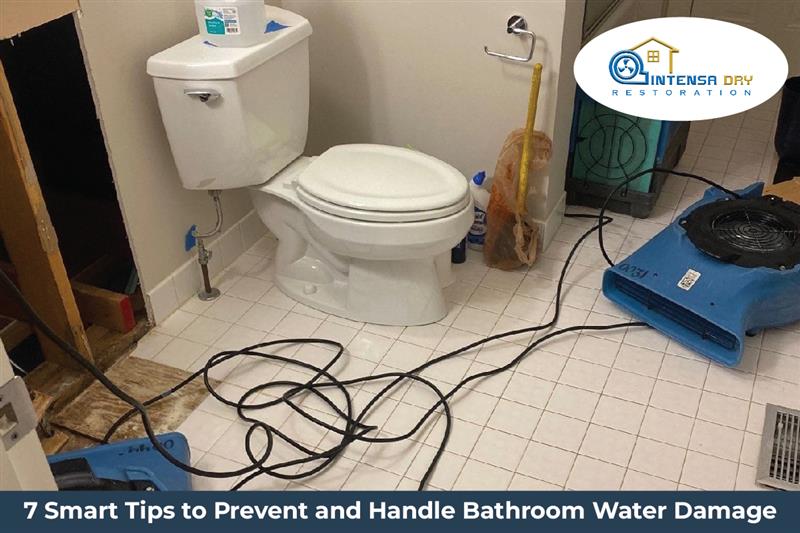
Water damage in bathrooms can sneak up on you—one day it’s fine, the next you’re dealing with warped floors, mold, or leaking toilets. Whether you’re tackling shower and tub water leaks or just want bathroom plumbing maintenance tips, staying ahead of trouble is key. By understanding signs of water damage in bathrooms and applying bathroom waterproofing solutions—like sealing grout and tiles and installing proper ventilation—you can sidestep costly repair work. From hidden bathroom water damage signs to preventing water pooling in bathrooms, you’ll learn the essentials and more. So let’s get started—here are 7 smart but simple tips to prevent and handle bathroom water damage, delivered in an easy, active-voice style that reads like a conversation with a pro.
1. Detect Early: Watch for Hidden Bathroom Water Damage Signs
That subtle musty smell, a warped tile edge, or a mysterious increase in your water bill? Those could be early detection of bathroom leaks or signs of water damage in bathrooms. Spotting these early can save you from mold and structural decay. For instance, peeling paint, soft drywall, and bubbling wallpaper—they often hint at water pooling behind the walls. You’ll avoid bigger headaches if you act fast.
Next, regularly check grout and caulking. Those are your first line of defense—bathroom caulking and resealing tips matter! A cracked or porous caulk allows water to seep into walls or beneath floors, leading to bathroom floor water damage. Reapply or refresh it annually, especially around tubs and showers.
2. Seal and Shield: Grout, Tiles, and Caulking Protection
Waterproofing isn’t just for exteriors. Bathroom waterproofing solutions start with your tile joints and edges. When grout cracks or grout lines wear down, water seeps through and undermines tile adhesion and subfloor integrity. Transitioning from a proactive stance? Use high-quality silicone caulk around tub edges and grout sealant after cleaning. This reduces water infiltration and inhibits mold.
Moreover, consider installing water-resistant flooring, like vinyl or sealed ceramic, to prevent bathroom floor water damage. Coupled with absorbent bath mats used strategically, you safeguard surfaces from accidental spills or shower splashes. These simple fixes go a long way toward preventing water pooling in bathrooms.
3. Patrol Plumbing: Prevent Common Bathroom Leaks and Fixes
A small drip from a faucet or showerhead can stealthily destroy your bathroom’s structure. You’ll want regular bathroom plumbing maintenance tips—inspect under sinks and around toilet bases, and check the plumbing valves. Loose connections or worn washers can lead to leaking toilets or hidden pipe drips that often become water damage behind cabinets or walls.
Upgrade old fixtures when needed. Efficient, modern faucets and showerheads not only look great but also reduce the risk of leaks and slash water usage—saving money and stress. If in doubt, shut off the water main during longer vacations—and know where your water shut-off valve is located. That’s a pro move that prevents major problems.
4. Ventilate Smartly: Reduce Moisture and Stop Mold Growth
Bathroom ventilation is more than a nice-to-have—it’s a must. Excess humidity fuels mold, especially in tight, enclosed bathrooms. Running a powerful exhaust fan during—and at least 15 minutes after—a shower clears airborne moisture effectively. If you have a window, crack it open for airflow. This helps counter condensation on ceilings or windows, which otherwise invites black mold growth.
Also, keep the fan vent clean and replace filters as needed. Without this step, effectiveness drops, and moisture lingers. These steps dramatically impact how to stop bathroom mold growth—without the high cost of remediation services.
5. Know the Signs and Respond Quickly: Overflow, Clogs, and Spills
Toilet overflows and bathtub backups happen—sometimes despite the best prevention. If a toilet overflows, shut off the water supply, push down the flapper, and clear clogs with a plunger or auger if safe. Don’t flush again. Handle an overflow promptly to reduce water damage from leaking toilets.
For tubs and sinks, turn off faucets, mop up water, and address slow drains with a snake or safe natural cleaners like baking soda and vinegar. Act promptly—standing water damages cabinets and flooring, and invites mold. This is how to stop bathroom water damage fast in emergencies.
6. Protect Surfaces: Cabinets, Floors, and Walls from Water Exposure
Cabinets and walls near plumbing are especially vulnerable—water splashes, leaks, or vapors creep in. Use waterproof mats near sinks and tubs, and wipe down any spills immediately. Seal exposed wood cabinets with water-resistant finishes to protect bathroom cabinets from water damage.
If you spot discolored baseboards, buckling floors, or wallpaper bubbling—those are real signs of water damage in bathrooms, and intervention now prevents more extensive issues. Replace damaged drywall or subfloor promptly to maintain structural integrity.
7. Plan Ahead: Costs, Insurance, and Professional Help
Prevention is always cheaper than repair. Still, if water damage happens, knowing your options matters. Be aware of the cost of fixing bathroom water damage—minor resealing and patching may cost little, while mold removal or structural repair escalates quickly.
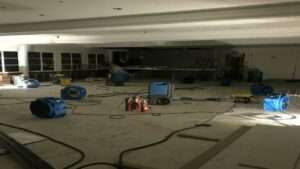
Check if your insurance policy has bathroom water damage insurance coverage—or if you need to upgrade. In severe cases, professional water damage restoration ensures proper drying, mold removal, and repair. Expert pros use dehumidifiers and HEPA filtration and know how to mitigate category 2 or 3 water issues (like gray or contaminated water) safely.
Wrap-Up
Smart prevention and fast response are your best defense against bathroom water damage. By spotting hidden bathroom water damage signs early—like warped tiles or musty odors—you stay ahead. Sealing grout, refreshing caulk, and installing proper ventilation keep moisture at bay and mold out. Routine plumbing checks stop leaking toilets and shower drips before they escalate, and timely action on overflows prevents costly repairs. Waterproofing vulnerable surfaces like floors and cabinets adds another layer of protection. Finally, knowing your insurance coverage and when to call restoration professionals ensures you’re not caught off guard. Use these tips to safeguard your bathroom’s comfort, health, and longevity—your home (and wallet) will thank you.
FAQs
Q1: How often should I reseal grout and caulking?
Ideally, once a year—or sooner if you notice cracks or discoloration. This helps maintain a waterproof barrier and prevent bathroom water damage.
Q2: Can I prevent mold just by using ventilation?
Ventilation dramatically reduces moisture, but you should also seal grout and fix leaks promptly. Together, these steps significantly inhibit mold growth in bathrooms.
Q3: When should I call a professional for bathroom water damage?
Call in pro help if you see mold beyond surface level, large-scale leaks, contaminated water (gray or black), or structural damage like sagging ceilings. Quick mitigation matters—within 24-48 hours.
Q4: Does insurance usually cover bathroom water damage?
Coverage varies. Standard homeowner policies often cover sudden incidents (like burst pipes) but not slow leaks or lack of maintenance. Review your policy and consider flood or extended coverage if needed.
Related Posts
While waiting for the restoration team to arrive, it’s crucial to take some initial steps to minimize damage and ensure safety. First, if you have Intensa Dry, use it to start drying out any wet areas—this helps prevent mold and…
Continue Reading
A fire damage restoration inspection is a critical first step in the recovery process following a fire incident. During this inspection, professionals will thoroughly assess the extent of the damage to your property, identifying areas affected by flames, smoke, and…
Continue Reading