Discovering water damage on your ceiling tiles can be distressing, but with the right approach, you can restore them to their former condition. In this comprehensive guide, we’ll walk you through the steps to repair water-damaged ceiling tiles effectively, ensuring your space regains its beauty and integrity.
Understanding Ceiling Tile Water Damage Repair
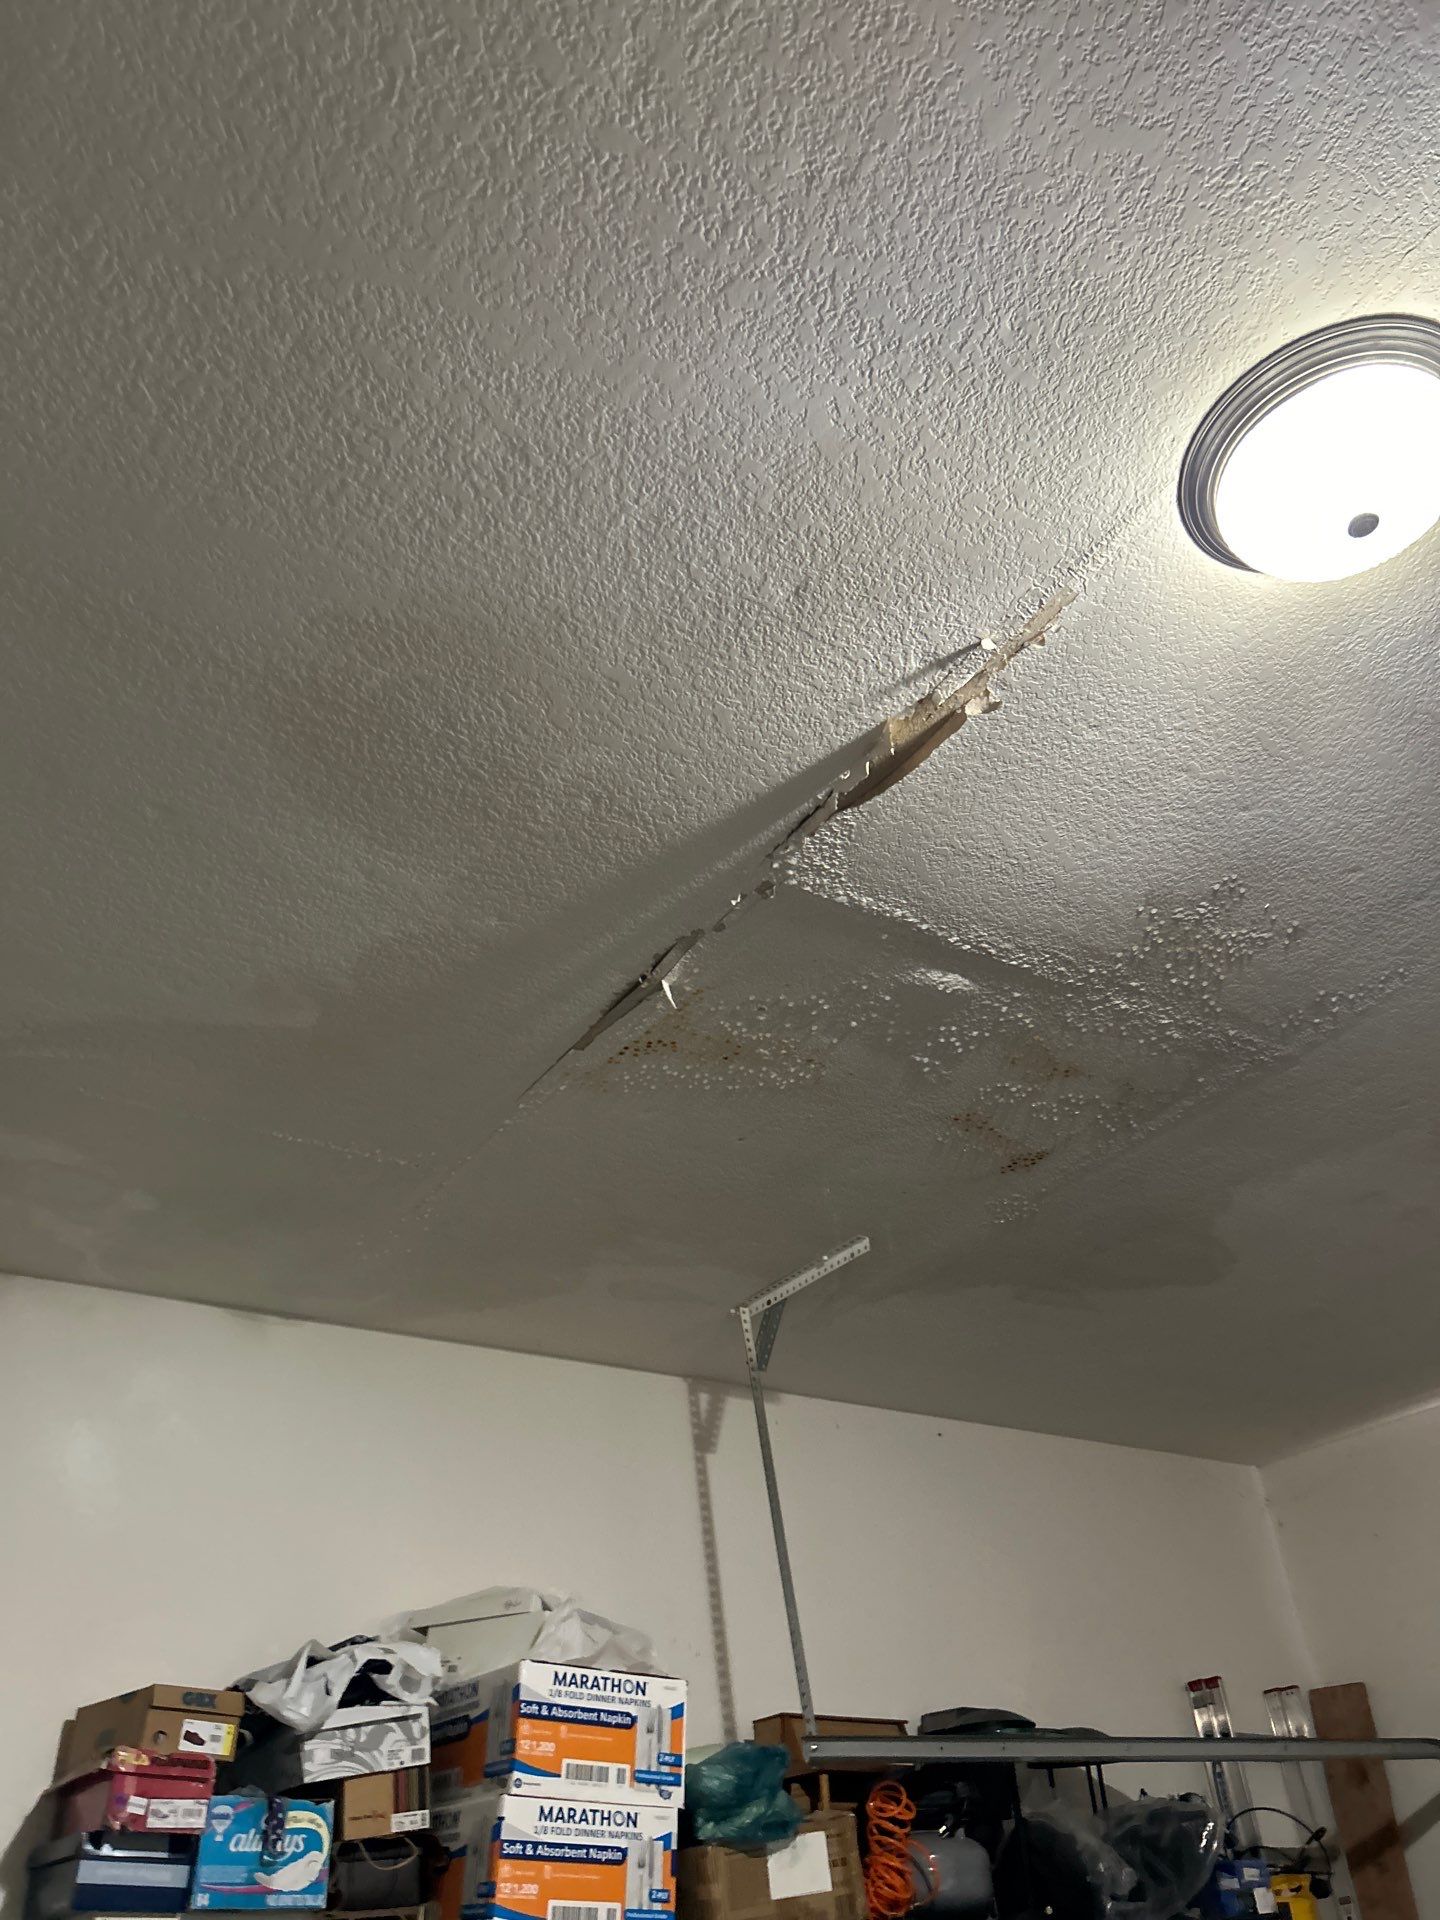
- Initial Assessment: Begin by thoroughly assessing the extent of the water damage on your ceiling tiles, identifying affected tiles and underlying issues.
- Swift Response: Act promptly to address the water damage and prevent further deterioration.
Essential Steps to Repair Water-Damaged Ceiling Tiles
- Safety Precautions:
- Prioritize safety by turning off electricity to the affected area and wearing protective gear such as gloves and goggles.
- Identify and Stop the Source:
- Determine the source of the water damage and address any leaks or moisture issues to prevent future damage.
- Remove Damaged Tiles:
- Carefully remove water-damaged ceiling tiles using a putty knife or similar tool, ensuring minimal damage to surrounding tiles.
- Dry the Area:
- Thoroughly dry the exposed ceiling area using fans, dehumidifiers, or natural ventilation to prevent mold growth.
- Replace and Restore:
- Replace damaged tiles with new ones of the same size and style, ensuring a seamless match with the existing ceiling. Secure the tiles in place with adhesive or clips.
- Inspect and Maintain:
- Conduct a final inspection to ensure all repairs are complete and the area is free from moisture. Monitor the ceiling regularly for signs of mold or water damage and address any issues promptly.
Contact Intensa Dry Today!
By following these essential steps and exercising caution, you can effectively repair water-damaged ceiling tiles and restore the beauty and functionality of your space. Ready to tackle water damage repair on your ceiling tiles? For professional assistance and quality restoration services, contact Intensa Dry today. Let us help you revive your ceiling and create a safe, beautiful environment for your home or business.