Blogs
Step-by-Step Guide to Fix Water-Damaged Drywall and Ceiling

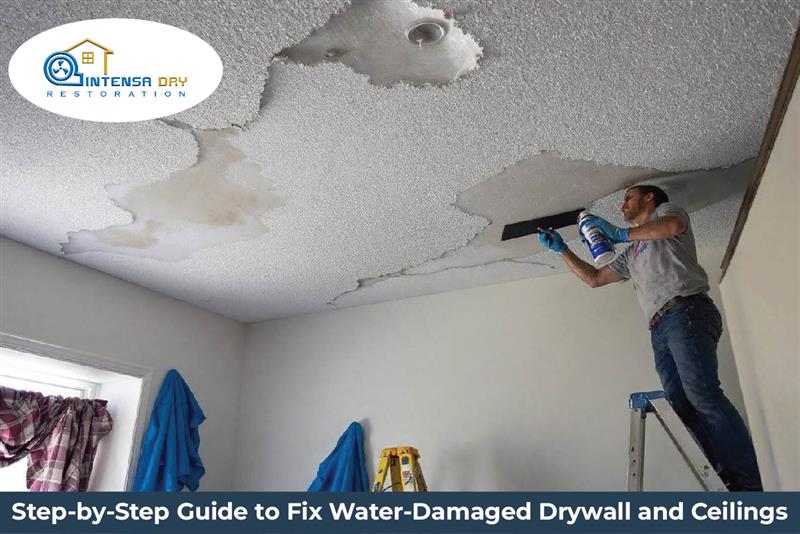
Few things frustrate homeowners more than spotting water stains, bubbling paint, or sagging drywall overhead. Not only does it look bad, but it can also mean hidden problems like mold, weakened structure, or ongoing leaks. The good news? With the right approach, you can handle ceiling water damage fixes without feeling overwhelmed. This step-by-step guide covers everything from drying out wet drywall ceilings to patching holes, smoothing seams, and repainting so the repair blends seamlessly. Along the way, you’ll also learn how to repair drywall ceiling water damage safely, what costs to expect, and how to prevent future issues. Whether you’re a first-time DIYer or someone experienced with home projects, you’ll walk away with practical knowledge you can trust.
Identify the Source Before Starting Repairs
No repair lasts unless the cause of the water damage is addressed first. That’s why your very first step is detective work. Look above the damaged area and ask: Is this from a roof leak, a faulty pipe, condensation from HVAC ducts, or maybe a bathroom above?
Once you track it down, shut off the water or patch the roof temporarily. This step matters because repairing the sheetrock ceiling water damage without stopping the source just guarantees you’ll be repeating the process soon. A true ceiling leak repair guide always starts with solving the leak, not the stain.
Dry Out the Wet Ceiling Thoroughly
Drying is a step many people rush through—but it’s one of the most important. Even if the surface looks fine, hidden moisture can stay trapped inside drywall or insulation. Use fans, open windows, and a dehumidifier if you have one. In colder months, raising the room heat helps accelerate evaporation.
You’ll know drywall is ready when it no longer feels cool or spongy to the touch. Drying out wet drywall ceiling materials completely prevents mold, which can take hold in as little as 48 hours. If moisture lingers, consider removing insulation behind the drywall so airflow can reach all hidden spaces.
Remove Damaged Drywall and Ceiling Materials
Once dry, you’ll need to cut away the damaged portions. For small spots, a sharp utility knife works. For larger sections, a drywall saw gives you straighter edges, making patching easier. Always cut back until you reach solid, undamaged material.
Bag all removed drywall, plaster, or insulation immediately. Even if you don’t see black spots, moisture-exposed material may harbor mold spores. Removing compromised drywall also lightens the load if you’re fixing sagging ceiling drywall—sometimes the damaged material is literally weighing down the surface.
Treat Stains, Mold, and Odors
If water leaves behind dark stains or a musty smell, this is where you tackle it. For minor surface mold, scrub with a diluted bleach solution or a store-bought mold remover. Always wear gloves and goggles. For heavy growth that covers more than 10 square feet, call a professional—it’s not worth risking your health.
When the area is clean, apply a stain-blocking primer. This not only hides discoloration but also stops tannins or rust from bleeding through your new paint. Without this step, repairing water stains on the ceiling often ends with the dreaded yellow “ghost” mark reappearing.
Patch and Rebuild the Ceiling Surface
Now comes the drywall patching after a water leak. Cut a fresh piece of drywall to fit the hole. If the hole is large, screw wooden backing strips inside the cavity so the patch has something to rest against. Secure the drywall firmly with screws.
Next, apply mesh tape along the seams, then use drywall joint compound for water damage repairs. Spread thin layers, feathering the edges outward so the patch blends smoothly. Let each layer dry completely before sanding lightly. Repeat until the surface looks uniform. This is the part that transforms rough repair into a professional-looking finish.
Smooth Out Cracks and Sags
Sometimes water leaves behind cracks, bulges, or sagging panels rather than just holes. If cracks exist, reinforce them with mesh tape and cover with compound. If you’re fixing sagging ceiling drywall, it may require extra screws into the joists to pull everything tight again—or in severe cases, replacing entire panels.
Take your time here. Uneven repairs stand out under lighting, especially on ceilings. Use a work light at an angle to highlight flaws as you sand. The more carefully you smooth now, the better your finished ceiling will look once painted.
Prime, Paint, and Blend for a Seamless Finish
After sanding, the ceiling should be dust-free before priming. Apply a stain-blocking primer over both the patched area and the surrounding space to ensure even coverage. For best results, feather the primer outward instead of stopping abruptly.
Once the primer dries, paint with high-quality ceiling paint. Two coats are usually best. If you’re repairing plaster ceiling water damage, use a roller designed for textured surfaces. Painting not only hides imperfections but also seals the repair, protecting it against future moisture. Ceiling paint peeling after water damage won’t happen again if you prime and paint properly this time.
Understand Repair Costs and Professional Help
The cost to repair water-damaged ceiling drywall varies widely. A small DIY patch job may cost under $100 in materials. Larger jobs involving structural reinforcement or professional mold remediation can climb into the hundreds or thousands.
If you notice persistent leaks, widespread mold, or damage larger than a few panels, hiring a contractor is the safest move. They’ll follow the complete water leak drywall repair process with the right tools and safety equipment. Sometimes paying more upfront prevents repeat repairs and protects your home’s value long-term.
Prevent Future Water Damage
Once your ceiling looks brand-new again, it’s time to think about prevention. Regularly check roof shingles, plumbing joints, and bathroom caulking. Keep gutters clear so water drains away from the house instead of seeping inside.
If your home is prone to humidity, install a dehumidifier or improve ventilation. Small steps like these mean you won’t have to repeat drywall water damage replacement steps in the near future. Prevention is the final stage of any effective ceiling water damage fix.
Wrap-Up
Repairing water-damaged drywall or ceilings may seem intimidating, but step by step, it becomes manageable. By identifying and fixing the source of leaks, drying thoroughly, removing compromised materials, treating stains, patching with joint compound, and finishing with primer and paint, you restore your ceiling to a safe, attractive condition. Along the way, you also reduce the risk of mold growth and protect your home’s structure. And remember, the cost to repair water-damaged ceiling drywall depends on size and severity, but tackling issues early always saves money and stress. With a little patience and care, you can transform a stained, sagging mess into a ceiling that looks as though nothing ever happened.
FAQs
1. How do I know if drywall should be replaced or repaired?
If drywall is soft, crumbling, or moldy, replace it. If it’s just stained but dry and firm, you can usually repair it with primer and paint.
2. Can I repair ceiling cracks after water damage with just paint?
No. Paint alone won’t hold. Use mesh tape and joint compound to reinforce cracks, then sand and repaint.
3. How do I remove water stains from the ceiling without repainting the whole room?
Use a stain-blocking primer and blend paint into the existing area. If the match is close, you won’t need to redo the entire ceiling.
4. Is DIY drywall water damage repair safe?
Yes, for small jobs. Wear protective gear and ensure the area is dry. For mold larger than 10 square feet or structural damage, hire a pro.

