Jump To:
- Identify the Source Before Starting Repairs
- Dry Out the Wet Ceiling Thoroughly
- Remove Damaged Drywall and Ceiling Materials
- Treat Stains, Mold, and Odors
- Patch and Rebuild the Ceiling Surface
- Smooth Out Cracks and Sags
- Prime, Paint, and Blend for a Seamless Finish
- Understand Repair Costs and Professional Help
- Prevent Future Water Damage
- FAQs
Few things frustrate homeowners more than spotting water stains, bubbling paint, or sagging drywall overhead. Not only does it look bad, but it can also mean hidden problems like mold, weakened structure, or ongoing leaks. The team at Intensa Dry Restoration has responded to hundreds of ceiling water damage calls across the DFW area, and we’ve learned exactly what works when fixing damaged ceilings. With the right approach, you can handle ceiling water damage fixes without feeling overwhelmed.
This guide covers everything from drying out wet drywall ceilings to patching holes, smoothing seams, and repainting so the repair blends seamlessly. You’ll learn how to repair drywall ceiling water damage safely, what costs to expect, and how to prevent future issues. Whether you’re a first-time DIYer or someone experienced with home projects, you’ll walk away with practical knowledge you can trust.
Identify the Source Before Starting Repairs
No repair lasts unless the cause of the water damage is addressed first. Your very first step is detective work.
Look above the damaged area and ask: Is this from a roof leak, a faulty pipe, condensation from HVAC ducts, or maybe a bathroom above? Once you track it down, shut off the water or patch the roof temporarily. We see this mistake constantly in our emergency response calls, where homeowners try fixing the drywall while water continues dripping behind it.
This step matters because repairing the sheetrock ceiling water damage without stopping the source just guarantees you’ll be repeating the process soon. A true ceiling leak repair guide always starts with solving the leak, not the stain. According to the EPA, moisture control is the most critical factor in preventing mold growth after water damage.
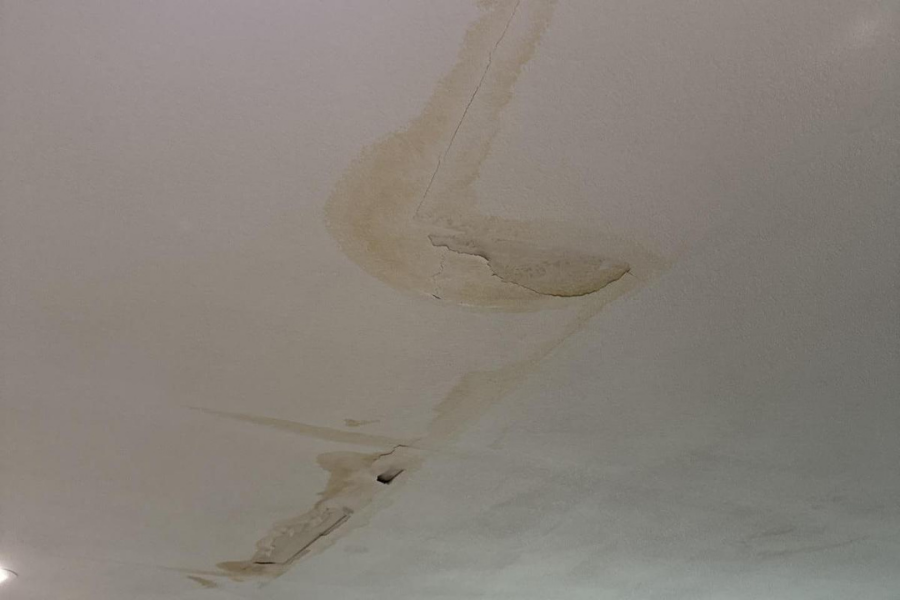
Water stains and peeling paint indicate active moisture problems that must be addressed before repairs begin
Dry Out the Wet Ceiling Thoroughly
Drying is a step many people rush through, but it’s one of the most important. Even if the surface looks fine, hidden moisture can stay trapped inside drywall or insulation.
Use fans, open windows, and a dehumidifier if you have one. In colder months, raising the room heat helps accelerate evaporation. You’ll know drywall is ready when it no longer feels cool or spongy to the touch. Our IICRC-certified technicians use specialized moisture meters to verify materials are completely dry before starting repairs.
Drying out wet drywall ceiling materials completely prevents mold, which can take hold in as little as 48 hours. If moisture lingers, consider removing insulation behind the drywall so airflow can reach all hidden spaces. The science behind this process involves understanding structural drying techniques that professional restoration companies use daily.
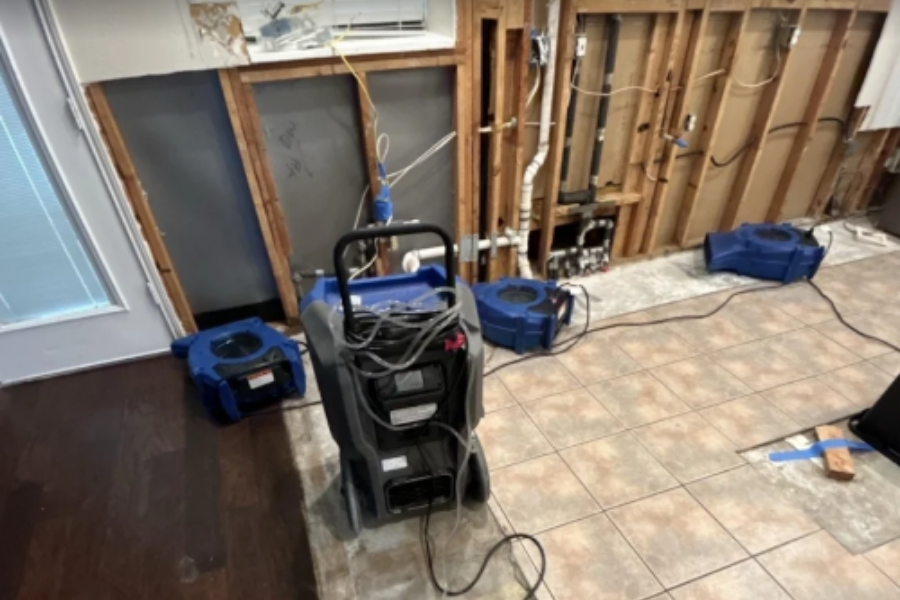
Professional drying equipment helps remove moisture from ceiling materials before repair work begins
Dealing With Extensive Ceiling Water Damage?
If you’re facing widespread damage, persistent leaks, or signs of mold growth, professional help can save you time and prevent costly mistakes. Our team responds to emergencies across the Dallas-Fort Worth area in under 40 minutes.
Call (972) 992-7331 for 24/7 emergency response
Remove Damaged Drywall and Ceiling Materials
Once dry, you’ll need to cut away the damaged portions. For small spots, a sharp utility knife works.
For larger sections, a drywall saw gives you straighter edges, making patching easier. Always cut back until you reach solid, undamaged material. Bag all removed drywall, plaster, or insulation immediately.
Even if you don’t see black spots, moisture-exposed material may harbor mold spores. Removing compromised drywall also lightens the load if you’re fixing sagging ceiling drywall, since the damaged material is literally weighing down the surface. This is part of the standard water damage restoration process that professionals follow.
Treat Stains, Mold, and Odors
If water leaves behind dark stains or a musty smell, this is where you tackle it. For minor surface mold, scrub with a diluted bleach solution or a store-bought mold remover. Always wear gloves and goggles.
For heavy growth that covers more than 10 square feet, call a professional. CDC guidelines recommend professional intervention for large mold infestations because DIY cleanup can spread spores throughout your home. It’s not worth risking your health.
When the area is clean, apply a stain-blocking primer. This not only hides discoloration but also stops tannins or rust from bleeding through your new paint. Without this step, repairing water stains on the ceiling often ends with the dreaded yellow “ghost” mark reappearing. Professional mold remediation ensures complete treatment and prevents recurrence.
DIY Mold Treatment Checklist
- Safety first: Wear N95 respirator mask, gloves, and eye protection
- Ventilation: Open windows and use fans to direct air outside
- Containment: Seal off affected room with plastic sheeting if possible
- Cleaning solution: Use 1 cup bleach per gallon of water or EPA-registered fungicide
- Application: Scrub surface thoroughly and let solution sit for 10-15 minutes
- Disposal: Bag all cleaning materials and dispose of properly
- Professional help: Contact experts if mold covers more than 10 square feet
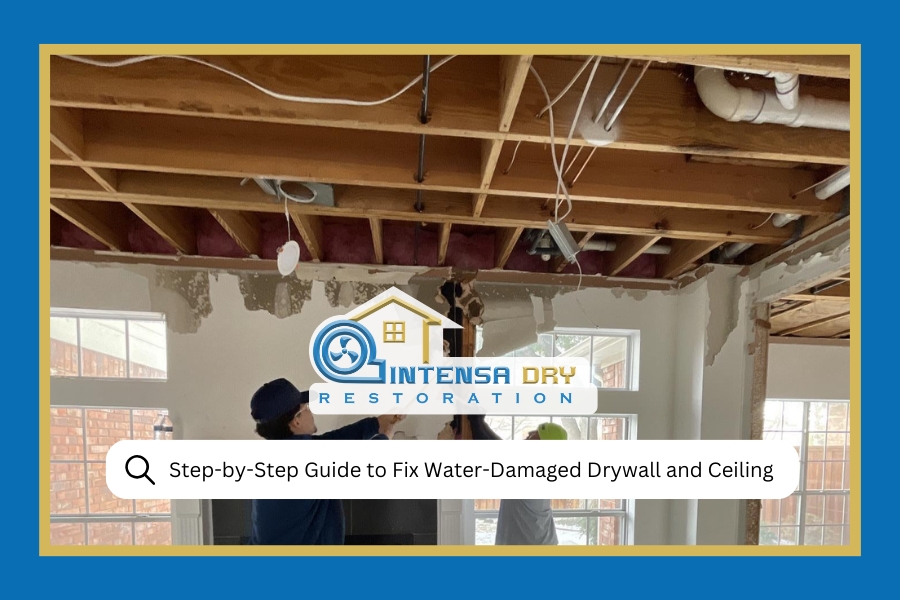
Patch and Rebuild the Ceiling Surface
Now comes the drywall patching after a water leak. Cut a fresh piece of drywall to fit the hole. If the hole is large, screw wooden backing strips inside the cavity so the patch has something to rest against. Secure the drywall firmly with screws.
Next, apply mesh tape along the seams, then use drywall joint compound for water damage repairs. Spread thin layers, feathering the edges outward so the patch blends smoothly.
Let each layer dry completely before sanding lightly. Repeat until the surface looks uniform. This is the part that transforms rough repair into a professional-looking finish. The key is patience and multiple thin coats rather than trying to fix everything with one thick application.
| Repair Scope | DIY Materials Cost | Professional Service |
|---|---|---|
| Small patch (under 1 sq ft) | $25-$50 | $150-$300 |
| Medium repair (1-4 sq ft) | $75-$150 | $300-$600 |
| Large section (full ceiling panel) | $200-$400 | $800-$1,500 |
| Extensive damage with mold | Not recommended | $1,500-$5,000+ |
Smooth Out Cracks and Sags
Sometimes water leaves behind cracks, bulges, or sagging panels rather than just holes. If cracks exist, reinforce them with mesh tape and cover with compound.
If you’re fixing sagging ceiling drywall, it may require extra screws into the joists to pull everything tight again. In severe cases, replacing entire panels becomes necessary. Take your time here. Uneven repairs stand out under lighting, especially on ceilings.
Use a work light at an angle to highlight flaws as you sand. The more carefully you smooth now, the better your finished ceiling will look once painted. This attention to detail separates amateur repairs from professional results.
Prime, Paint, and Blend for a Seamless Finish
After sanding, the ceiling should be dust-free before priming. Apply a stain-blocking primer over both the patched area and the surrounding space to ensure even coverage. For best results, feather the primer outward instead of stopping abruptly.
Once the primer dries, paint with high-quality ceiling paint. Two coats are usually best. If you’re repairing plaster ceiling water damage, use a roller designed for textured surfaces.
Painting not only hides imperfections but also seals the repair, protecting it against future moisture. Ceiling paint peeling after water damage won’t happen again if you prime and paint properly this time. Many homeowners skip the primer step and regret it when stains bleed through months later.
⚠️ When DIY Isn’t Enough
Professional help becomes necessary when:
- Mold growth exceeds 10 square feet
- Water damage involves sewage or contaminated water
- Structural sagging indicates joist damage
- Electrical fixtures are involved or nearby
- Ceiling texture matching requires specialized equipment
Our reconstruction services handle everything from minor repairs to complete ceiling replacement.
Understand Repair Costs and Professional Help
The cost to repair water-damaged ceiling drywall varies widely. A small DIY patch job may cost under $100 in materials. Larger jobs involving structural reinforcement or professional mold remediation can climb into the hundreds or thousands.
If you notice persistent leaks, widespread mold, or damage larger than a few panels, hiring a contractor is the safest move. They’ll follow the complete water leak drywall repair process with the right tools and safety equipment.
Sometimes paying more upfront prevents repeat repairs and protects your home’s value long-term. Insurance often covers water damage repairs, especially when the damage results from sudden incidents like burst pipes or water heater failures. Understanding repair costs by square footage helps you budget appropriately.
What Affects Professional Repair Costs?
- Damage extent: Size and depth of affected areas
- Water category: Clean water vs. contaminated water sources
- Mold presence: Remediation adds specialized treatment requirements
- Structural issues: Joist or beam damage requires additional repairs
- Material matching: Textured ceilings need specialized application
- Access difficulty: High ceilings or tight spaces increase labor costs
- Emergency timing: After-hours or weekend calls may carry premium rates
Prevent Future Water Damage
Once your ceiling looks brand-new again, it’s time to think about prevention. Regularly check roof shingles, plumbing joints, and bathroom caulking. Keep gutters clear so water drains away from the house instead of seeping inside.
If your home is prone to humidity, install a dehumidifier or improve ventilation. Small steps like these mean you won’t have to repeat drywall water damage replacement steps in the near future. Our team at Intensa Dry Restoration has seen too many homeowners face repeated damage because they didn’t address the underlying moisture problems.
Prevention is the final stage of any effective ceiling water damage fix. Understanding early warning signs helps you catch problems before they become expensive disasters.
Monthly Ceiling Maintenance Checklist
Interior Checks
- ✓ Inspect for new stains
- ✓ Check bathroom exhaust fans
- ✓ Look for ceiling sagging
- ✓ Test for soft spots
Roof & Attic
- ✓ Examine roof flashing
- ✓ Clear gutter debris
- ✓ Inspect attic insulation
- ✓ Check for daylight leaks
Plumbing Systems
- ✓ Test supply line pressure
- ✓ Examine visible pipes
- ✓ Check water heater pan
- ✓ Monitor water bill usage
Wrap-Up
Repairing water-damaged drywall or ceilings may seem intimidating, but step by step, it becomes manageable. By identifying and fixing the source of leaks, drying thoroughly, removing compromised materials, treating stains, patching with joint compound, and finishing with primer and paint, you restore your ceiling to a safe, attractive condition.
Along the way, you also reduce the risk of mold growth and protect your home’s structure. The cost to repair water-damaged ceiling drywall depends on size and severity, but tackling issues early always saves money and stress. With a little patience and care, you can transform a stained, sagging mess into a ceiling that looks as though nothing ever happened.
If you’re dealing with extensive damage or need professional assistance, contact our team for a free consultation. We serve the entire Dallas-Fort Worth area with 24/7 emergency response.
Frequently Asked Questions
How do I know if drywall should be replaced or repaired?
If drywall is soft, crumbling, or shows visible mold growth, it needs replacement. When you press on the damaged area, compromised drywall feels spongy or gives way under light pressure. If it’s just stained but remains dry and structurally firm, you can usually repair it with stain-blocking primer and paint. Water-damaged drywall that’s been wet for more than 48 hours typically harbors mold inside the paper backing and requires removal.
Can I repair ceiling cracks after water damage with just paint?
No, paint alone won’t hold or prevent cracks from reopening. Water damage weakens the drywall structure, and cracks indicate stress points that will continue expanding without proper reinforcement. Use mesh tape over the crack, apply several thin layers of joint compound, sand smooth between coats, then prime before painting. This reinforcement prevents the crack from reappearing and ensures a lasting repair.
How do I remove water stains from the ceiling without repainting the whole room?
Start by ensuring the source of water is fixed and the area is completely dry. Apply a stain-blocking primer like Kilz or Zinsser BIN directly over the stain, extending a few inches beyond the visible edges. Feather the primer outward to blend with the surrounding area. Once dry, apply ceiling paint that matches your existing color. If the match is close and you’ve blended properly, you won’t need to repaint the entire ceiling. Test the paint color in an inconspicuous spot first to verify the match.
Is DIY drywall water damage repair safe for homeowners?
DIY repairs are safe for small jobs (under 10 square feet) involving clean water and no structural damage. Always wear protective gear including N95 respirator mask, gloves, and eye protection when removing damaged materials. Ensure the area is thoroughly dry before starting repairs. However, call professionals for mold growth larger than 10 square feet, contaminated water (sewage or floodwater), structural sagging that indicates joist damage, or situations involving electrical fixtures. These conditions require specialized equipment and expertise to handle safely.